

Pfft. Let me begin by saying that this whole blown-in insulation project goes down in Fixer-Upper history as one of our least favorite. Ever. Which is saying a lot. It wasn’t one thing, but a combination of lots of little annoying things that made it suck so bad.
On Saturday morning Teague drove out to Home Depot bright and early to rent the “blower” – a machine that blows the insulation through a long hose and into your walls. Only, that H.D. only had one blower and it was broken. Yay hoorah. So he drove in the opposite direction to the other nearby H.D., where they promised a blower would be waiting for him. It was, but that H.D. was out of cellulose. SO…. he made a third stop at Lowes to pick that up.
The blower:

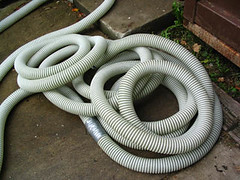
By the time he got home, the truck was jam-packed with insulating gear and it was nearly noon. We got to work immediately, unloading the unwieldly blower and dragging it out to a spot near a window. We hooked the hoses up, and duct taped them together since it was obvious they wouldn’t stay put for long.
Duct-taped hoses:
We started by insulating a ceiling upstairs. It’s one that we left accessible when we tore the hallway apart; it had no prior insulation so it was an easy place to start. I fed the “hopper” (the blue part of the blower) with cellulose, breaking it up into little bits before putting it in. Teague manned the hose, and ran the remote on/off switch so that he could stop the blower when moving the hose between joists. Things went really smoothly, and we had that ceiling insulated in about half an hour. I’d heard this stuff was a pain, so I was pleasantly surprised with how easy it was. HA!
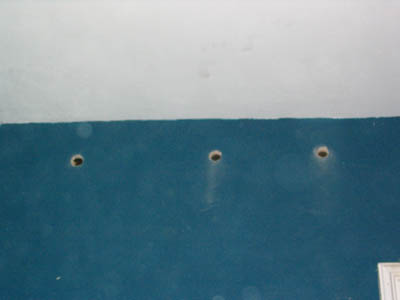
Next, we moved on the living room. It has 3 exterior walls, one of them north-facing. In the winter you can actually feel gusts of wind through them. Teague drilled holes (maybe 1.5″?) between each of the studs, which made a small but manageable mess. We dragged the hose in, making sure there were no kinks or sharp bends, and hooked up the wall attachment, a metal fitter with a small 1″ opening at the end.
By the time we got to the third wall cavity (out of approximately 25), the line was majorly clogged. We futzed, and emptied parts out, and tried again. Clogged. After futzing around for about a half an hour we got frustrated, started swearing, and generally lost patience. Teague called the store for tips, while I ran inside to do some internet research. We realized simultaneously that we had the hopper open too wide. We were sending too much cellulose at once, and the little nozzle couldn’t handle the pressure. Doh! We spent another half hour thoroughly cleaning out the hose again, set the hopper to the lowest width, and tried once more. CLOGGED. I was ready to cry.
Finally, we decided that the tiny little 1″ fitter they gave us was useless. Teague rifled through the shed and found a piece of leftover plumbing that had a wider opening. We duct-taped that to the hose, and VOILA. Like magic, that solved everything. Except that it was a little bit bigger than the holes we’d drilled, so we had to hold the hose up close to the wall and try our darndest not to make a giant mess. This resulted in major arm pain, but it worked.
We failed at the non-mess making. By the time we finished the living room and one other outer wall, it was getting dark out and our entire downstairs was covered in dust and cellulose debris. Every single surface. It was also scattered all over our driveway area, where the hopper was loaded. Obviously, we had not thought about how messy this stuff was going to be.
Lessons learned:
- Prepare for a big mess. Put plastic up in your doorways and tape the seams so you can keep the mess in one place. Put a big tarp under the hopper for easy clean-up outdoors.
- It’s more time consuming than you might think. We did 4 outer walls and one ceiling in about 8 hours. We had a major setback with the clogging, though.
- It’s definitely a two-person job. Three would be ideal, since it was hard to hold the hose in place and run the remote control at the same time. It took two hands to hold the hose steadily against the wall for that long.
- Don’t bother with the tiny nozzle! Start with something bigger, like 2″.
- Break your cellulose up into very small chunks, the smaller the better. The machine doesn’t agitate and break them up all that well.
- Watch your hose closely so you can catch it clogging before the whole thing is packed up. Once it’s packed, it’s a major pain to get cleaned out.
We ended up doing four walls and one ceiling in one 8-hour workday. We then spent the entire next day cleaning up the mess. The machine was $35/day to rent, and we used up 9.5 bricks of cellulose at $10/brick. So… not too costly, but a major pain. Hope it’ll be worth it when winter rolls around!
Comments, Thoughts, and Feedback
I am thoroughly impressed that you opted to do the blown insulation as a DIY project!! Whenever I have to open a wall or ceiling, I cringe at the thought of how all that stuff got in there. Great post.
thanks for the tips. Ours was done from the outside in the 70’s (I think, not sure on the timeline). We’re going to top it off one of these days, since I think it’s settled a lot over the years.
Wow, you all are a lot tougher than me. I would definatley rate blowing insulation as one of the jobs I felt real good about hiring out to a pro.
Best of luck on finishing the rest of the house; I think you’ll notice a real difference this winter.
Mindy,
Were those the only exterior walls you needed to fill? Just curious.
And thank you for sharing information that means something to those who might be considering doing this.
I had to rip out all of my walls because the plaster was in such bad shape. The walls will be filled with fiberglass batts this week as a matter of fact but I do have one bedroom that already had the sheetrock replaced so the blow-in will be my only option here and I’ve been avoiding it.
I’m sorry to hear you guys had such a time of it and do appreciate the heads-up!
I used this method to insulate the ceiling and walls in my attic when I finished it. It is definitely messy. I would love to do it in the walls in my house but with plaster on the inside and stucco on the outside it would be a major pain. It does work well though. It keeps the room warm in the winter and cooler in the summer.
Thanks, all – hope the write-up is helpful!
Patricia,
Those are not the only walls sans-insulation; our original plan was to tackle as much as we could afford before winter, but after we realized what a pain it was we decided to wait on the rest. Right now I would say about 1/2 of our exterior wall space is insulated, either with blown-in or fiberglass bat. When we moved in, the only insulation in the house (that we’ve found/noticed) was the blown-in in the attic, so we’re making progress!
We thought about doing it from the outside, but didn’t want to put holes in the clapboard or try removing it without damage. It’s easier to patch the plaster, so that’s where we drilled in. Doing it on the outside would kept the mess out of the house, though!!
Patricia,
You might be careful with the sheetrock. They guy who did ours said that a lot of the time the air pressure from the blower was enough to crack the sheetrock. I don’t know how bad of a problem this is, but you might want to keep it in mind.
Thanks for the info. and the tips! I’ll try to figure out some sort of brace to lean on the wall as I blast the insulation in. I only have the one outer bedroom wall and the closet (still has the old lathe/plaster combo) so it should be okay (I hope!).
Mindy, I’m was in the same boat. Insulation in the attic only and it’s not that thick. It’s okay (depth of the studs) but that isn’t so good for an attic or so I’m told. I swear, once I get all of the batts upstairs installed it will be cause for a huge celebration!
Our home built in 1917, lathe/plaster. I don’t know what’s inside the walls, but figure it is nothing, th eway the hosue gets cold anytime the heat isn’t running. How does one know if there is a benefit to be gained from doing insultion like this? Also another question- DUST!!! I have NEVER been in a house that gets so dusty after just 2- 3 days.I mean, it is everywhere. Nearly none of th ewindows operate ( painted shut) so it’s not like the dust is blowing in from them. It seems to be just as bad whetther we have the A/C or heater on or not. I am not a clean freak; just afraid it is harmful to our lungs. I have 2 HEPA filters in our bedrooms, seems to help a wee bit.Every few dasy I go through a roll of paper towels because I don’t clean w/ rags b/c they get nasty so quickly. Any suggestions?
Hi Elizabeth,
Hmm – well, if the walls feel cold to the touch then you’re probably without insulation. It makes a big difference in energy efficiency and overall warmth, so I think it’s worth investing in.
Regarding the dust….. we live with constant dust, dog hair, and dirt so I don’t have much to offer! Old houses seem to be dustier than new ones, probably because they have old materials in them that are starting to break down. Do you have old rugs, wood, etc that it could be coming from? Or maybe the plaster in the walls? If it gets windy around you, the plaster can blow around and the central air would pick it up and put it in your house. A good filter should catch that though. Make sure your furnace filter gets changed often too, and that your dryer vent is hooked up properly.
I got one of those microfiber rags for picking up drywall dust, and would highly recommend them!
Good luck fighting the dust ;)
I blow insulation every day , and the easiest way to insulate walls is to cut every stud bay with a 6 inch hole saw , 1 cut 18″ from the cieling , and 1 cut 4 feet from the floor. Pull all the old insulation out(if there is any). Tape the holes with masking tape untill it is time to blow that specific hole.Cut a hole in a 6 inch sponge and slide it over the hose so that when the hose is in the wall you dont get sprayed in the face with insulation.
And if you live in Las Vegas Just Call me
American InsulatorsLV702-325-7506
My question is this…can you blow in the insulation on top of the drop-in type of ceiling tile? the type that is held up with wires. just wondering…i want to blow it in if possible…..thanks in advance for any info you could help with.
Barbara
Congratulations! You saved yourself a bunch by Doing it yourself. I had a contractor estimate insulating a attic at $1400. I did the work and saved a bundle. Sorry to hear you went to Home Depot, If one thing that I’ve learned since buying my home is that every trip to Home Depot is a gauranteed 1-3 hour event between them not having something, it not working, or trying to find someone to help. Although if you call their corporate office with a complaint about them being out of something they will send you a $10-25 gift card. Besides lowes also will rent you the insulation machine for free if you buy a certain amount of insulation bricks; about 25, you can always return any unused amount after.
We would like to blow in insulation from the outside, which has at least 2 layers of siding, very old house that has not been taken care of very well. How would you start to drill the holes.
Enjoyed reading your comments. We are in the process of pysching ourselves up to do this process.
I had a couple of friends tell me that you need to make sure you drill the hole outside any vapor barrior so the insulation is on the outside of it. Any comments?
My associate and I tried this and it IS a major mess. The two biggest problems we faced were this:
1. the power of the machine. The article states the machine was from Lowe’s. We discovered these machines are grossly underpowered; the hose gets clogged. We are going to rent a machine from a “rent-all” place that will be able to force the insulation in tight spots.
2. Is it necessary to drill holes between all of the studs in the wall (as shown in the photograph)?
I own an insulation company in Tennessee and we do blown in insulation every day. First let me say i’m glad you guys are trying to do what you can to save energy, but before taking on this project “do your homework”. It’s real easy to make a mess out of it and a mess up your project, I can’t tell you how many jobs we repair from people doing it themselves. They usually never vent their attic right, or clog up soffits or can’t get it even. I’m not saying not to do it, ive done my own share of do it yourself projects, just understand there are reasons our machines cost tens of thousands of $ and the ones you rent cost 2 to 3 thousand. most contractors will give you a free estimate. In my area I do it cheaper than most homeowners can do it themselves and back it up, with little to no mess.
Watch out for some companies though, get a few estimates if one sounds to high home depot has an insulation service in my area and charges 3 times what I do, that kind of stuff makes me sick. I mean I make a good living, but thats just taking advantage of people.
I seen a question above about blowing over a drop ceiling. Don’t do that. First off it’ll be the biggest mess you’ve ever seen, and you’ll never be able to do any work above the ceiling, second you cant insulate over lay in type lights (they’ll overheat), and last the dust from loose insulation will constantly fall down below. A 2 ft by 4ft batt works best, just take out one tile and lay batts on top of the ceiling. Again call a pro before you rush out and buy it from your local supply store, in that case i supply and install it usually for less then a homeowner can even buy it.
Another ? about drilling holes between the studs. yes, you have to. with the machines they’ll let you use, to do the jobs right you need to drill two holes one high and one low per stud cavity, but it’s really up to you. when we blow walls I have a special machine that blows with just enough force and a 1 inch hose set-up that we send all the way down the cavity to make sure it fills the entire cavity, and special plugs we fill the hole with so all you have to do is spackle and paint afterward.
i hope this was helpfull and good luck with your projects.
Jimmy Eckert
Attic Insulators
Minimize the wall work. You can blow into the walls without having to drill if you have additional floors to your home. Taking the baseboards off on the second floor will expose your first floor cavity. Still need to make sure all holes are patched and electrical outlets covered when blowing.
I’m near Cedar Rapids, IA and am wondering what average costs are to blow insulation into a 1700 square foot house’s outer walls that has vinyl siding by a pro?
The reason why you continued to have problems with the 1″ hose adapter after reducing the machine’s feed control is you were not sufficiently venting each wall cavity. As the material goes in you also have to allow the machine’s air pressure to escape, otherwise the pressure will continue to provide resistance to the material trying to exit the hose. Also your 1-hole method w/out venting will probably create a 10-15% settling at the top of each cavity due to your procedure creating a lower installed density (+/- 2.5 lbs. pcf). Densepacking (+/- 3.5 lbs. pcf) a sidewall to eliminate settling must ALWAYS be done by a method that allows the material to build from bottom to top. A common 1-hole method is to attach a smaller but rigid hose (8′ of hydraulic hose) clamped to the end of the reducer hose nozzle and insert thru a top hole lowering to the bottom and retracting as the cavity fills. As the machine boggs down you know to retract the hose in 6-12″ steps till you reach the top. Otherwise use the common 2-hole method. One final note: you MUST use a minimum of 50 ft. of flex hose with these smaller single blower machines. As far as the mess when installing cellulose, its like women putting on makeup. Some slop it on and …wha..la, while others put it on nice and neat allowing glamour to prevail, hopefully.
The reason why you continued to have problems with the 1″ hose adapter after reducing the machine’s feed control is you were not sufficiently venting each wall cavity. As the material goes in you also have to allow the machine’s air pressure to escape, otherwise the pressure will continue to provide resistance to the material trying to exit the hose. Also your 1-hole method w/out venting will probably create a 10-15% settling at the top of each cavity due to your procedure creating a lower installed density (+/- 2.5 lbs. pcf). Densepacking (+/- 3.5 lbs. pcf) a sidewall to eliminate settling must ALWAYS be done by a method that allows the material to build from bottom to top. A common 1-hole method is to attach a smaller but rigid hose (8′ of hydraulic hose) clamped to the end of the reducer hose nozzle and insert thru a top hole lowering to the bottom and retracting as the cavity fills. As the machine boggs down you know to retract the hose in 6-12″ steps till you reach the top. Otherwise use the common 2-hole method. One final note: you MUST use a minimum of 50 ft. of flex hose with these smaller single blower machines. As far as the mess when installing cellulose, its like women putting on makeup. Some slop it on and …wha..la, while others put it on nice and neat allowing glamour to prevail, hopefully. So, play it again Sam!
Thanks for the tip about venting the hole and reducing to the size of the hydraulic hose. Hopefully putting the hose through the hole in the sponge will still allow enough air to vent. It’s now March and there is at lest 4′ of snow around the house. Good idea to wait until the snow is gone and leave the machine outside and bring the hose through the window. I Haven’t gone to Lowe’s yet to see the machine. Perhaps that is stated in the directions. I am a skilled sheetrocker and am very aware of the nasty mess of taping all those holes. I am renting the first floor of a turn of the century house and new it was uninsulated when I rented it. However with the cost of fuel oil I am willing to buy the insulation if the landlord won’t. Surely the savings will help immediately. The kitchen and one bedroom have 3 outside walls. the other rooms are not as bad. The old windows are also huge but they are a delight for natural light. Thanks again for everyone who was willing to share there memorable experiences.
Our house was built in 1969.I have finished the major part of the remodel,so I am ready to insulate the attic witch now only has about 4 inches. The information here is very helpfull,thank you,but my question is,can I blow-in insulation in walls that already have bat insulation? I discovered,when replacing a window that the insulation in the walls is only 2 1/2 inches with an R value of 6 or 8, I can’t remember witch. This explains why we get a cold sensation when reaching into the cabinets that are on outside walls! Can insulation be added efectively without damaging vapor barrior?
Hi Folks,
My house was built in 1915. The attic has 6 inches of rock wool insulation under the floor boards. I like having some part of the attic accessible for storage. 1. Should I lay R19 or R30 insulation over the floor boards. But I hate the idea of losing all the storage.
Half my kitchen and my TV room are on top of crawl spaces and the floor is cold in the winter, in spite of a company placing batts of R19 fiberglass on the ceilings of the crawl spaces.
I was recently in one of the crawl spaces and part of the dirt on either perimeter side was moist. Someone said I should remove the batts under the crawl space ceiling and put them along the sill plates and tightly encapsulate both crawl spaces with polyethylene plastic at least 8 mill. 2. what do you think?
the walls of the house are cold in the winter. Possible solutions: 1. Blown in cavity wall insulation (either cellulose or fiberglass through the stucco exterior walls. The fiberglass guy who wants to charge $1,900.00 says fiberglass is the best and the cellulose guy says cellulose is the best and wants to charge $3,300.00. A third guy who only does foam says either is a waste as there will be lots of gaps with many hot and cold spots. My preference is the cellulose, as the holes would only be one inch, and thus easier to fill and match the color. Fiberglass must be installed with 2 inch holes. any recommendations. Should I have a contractor blow in the cavity walls with insulation. If yes, what type?
Thanks
Ken
I was wondering if you could blow insulation down into the wall from the attic…I have a walk in full attic with a 4-6″ gap all the way around the outter floor edge..So could I fill the walls from the top ? Or is the only true method from the outside? My house is 2 story with a full uninsulted Attic …If I was able to fill the walls from the attic would it go all the way down to the first floor or no? thanks for any help much appreciated
I have a solar power system so I need to know how many amps these blowers one rents from H.D./Lowe’s will draw. No sales people can tell me nor can I fine this listed on any machine.
I have an old house built with 8 inch concrete blocks and with stucco on the outside. My wife and kids did the stucco after we moved in and it is great! The inside walls are stripped and have sheet rock but no insulation. My utility bills are very high. The walls are cold in winter. I would like to blow insulation into the walls and the above information is very helpful. However I didn’t see a response about what type of insulation would be best; i.e., foam, cellulose, or fiberglass. I would like very much to hear if anyone has used foam and their experiences.
I am with intec, the makers of the force1 blower. dont hesitate to call me for advise on blowing walls, attics etc. there would have been almost no problems if i could have talked to you befor you started. Bill Jewell
Just curious purchasing old home has no insulation, I would like to know if new window should be replaced before insulation is blown in or does it matter? Also since it is only going on outer walls- is the best way to check the house wiring just by taking off outlet plugs.
hi,
What is the max i should pay to have insulation blown in? i received a quote for $1.70 square foot i did think that was kinda of high my house is aprox 720sft thats almost 1,400
I want to thank everyone,this was very helpful information for me. My home/cottage was built in 1920 still I do not know what i was thinking when i bought it. I am one of you that has no insulation i did find a newspaper from 1925 which is what they used in the basement for insulation .
Thank you for your article. I would like to share my story with everyone here. My house was built in 1969. The insulation in my attic was pretty thin and there was no insulation in my walls. I will just provide bullet points so my posting is not to long.
I rented the blower from Home Depot. In my local area, Denver, it cost $28/per day unless you buy 20 bags of fiber green insulation, then it was free. I bought 21 bags.
Got the blower home, hooked up the hoses, it was a nice day when I decided to do this project, so the hopper was outside the whole time. I can’t image putting it in the house. It would be SO messy.
Did one test bundle to make sure everything was going to work and it went perfectly. I highly recommend having three people. One in the attic, and two on the hopper.
It took 2hrs to blow the attic. Mind you, it was hot so I took about three 20 minute breaks within those 2hrs.
With the attic finished up, I decided to tackle my bedroom walls. I drilled 2 1/8in hole between each of the studs. (14 holes total) Now, the hose on the hopper was 3in in diameter. To make sure the insulation got down into the wall, i purchased a 90 degree PCV connector to attach to the hose. I used duct tape to attach the PCV connector to the 3in hose.
I read a posting on this very site from a contractor that recommended getting a sponge, cutting a whole in it, put the hose through, and press that up against the wall.
It worked like a charm! The duct tape, PVC connector, and sponge. I can’t recommend enough doing this. My walls took 6 bundles for my walls.
So, there you have it. Those other posts who said it would have cost them just as much to have a contractor do it versus doing it themselves, I do not see how.
I was so happy to do it myself and it gave me another pride moment in home ownership.
Thanks so much for this write up! I think my husband and I are going to attempt to blow in our own insulation here soon. From the outside though (we have vinyl siding on a house built in 1921 – hope there aren’t too many large hangups).
This is a great article with great comments – will make sure the husband reads this before we attempt this job!
Take care,
Becky
We just reinsulated our exterior walls from the outside. We popped off a row of vinyl siding from near the top and near the bottom, drilled holes and filled in. We plugged with plastic caps (purchased from an insulation catalog) and popped the siding back on. No mess, except for some blowout by the holes and of course by the hopper. I’m actually writing an article on my site about our adventure, which is how I found this one.
We just insulated our ceiling it was so easy, this is a do it yourself project, we had 3 of use me, my husband and our teen daughter, We just turned up the mixer and broke up the cellulose into small pieces and dropped them in the barrel and my husband ran the blower hose. we did 16 bags in just 1 hour. Total cost 170 dollars, free use of machine. Bam its done.
OK. I’ve done some homework on insulating attic floors, but not a lot out there for blowing insulation under existing attic floor boards. I plan to pull boards up and have the longest run be 4′ -5′ long. When I rent a blower machine, should I create a rigid narrower “tube” than the standard 2 1/2″ diam hose they supply? I’m thinking I will have a hard time sliding the 2 1/2″ hose along the 3 1/2″ existing fiberglass insulation and cross bracing, but with a narrower and stiffer tube I might be able to shove/slide this down to the end of each joist bay and then pull it back slowly. What is the best diameter to use for this cobbed setup? Also, how best to prevent clogging? My guess is you get the feel of it and hear the pitch of the air blowing change as the cavity fills. Also, how tight do you pack the cellulose? Can you pack it too tight? And finally, how much does the stuff spray all over the attic? Should I create some type of cardboard baffle with a 2 1/2″ hole in it to prevent dust from going everywhere?
Thanks.
I have a triple-wide mobile home built in 1995 “Redman”. I want to do the blown insultation on all outside walls. Because it is a moble home, is this possible? and I also want underneath of mobile redone? how should I go about doing this?
Just completed blowing in cellulose in my attic and walls–while it was not easy and took 4 days, it was worth it. Spent $280 for insulation (48 bags), another 50 for additional tools, but compare this to $3500 I was quoted last year by a professional. My attic is 575 s.f. Only did about 1/2 of all exterior walls because i was doing if from the inside, and didnt feel like spending the next month plastering holes and painting. Rented the machine at home depot, they will let you keep it overnight, which is a MUST. Menards in WI will not. For walls, I did the one hole at the top method, and bought a smaller 24′ 1.25 dia corrugated hose from the plumbing dept for $10, cut it down to 6′, and found a transition piece for the 3″ tube in the shop vac parts area. Just duct taped it together, and drilled 2″ holes into the walls. This worked well, theres enough dia. left with the smaller hose in the wall for air to escape while blowing in insulation. It got clogged a few times at the transition, just turn it off immediately so insulation does not build up in the hose and cause major clogs. We learned the hard way about this, spent an hour unclogging the entire 100′ of hose. But only happened once. with the smaller hose, you can get deep into the wall, avoid a second hole in the cavity, and bend it where it needs to go. I was skeptical, but very happy with the results, and it seemed to fill 12′ runs of my balloon frame walls completely. It even worked for a flat roof area, blowing into from the ceiling below.
i just finished filling walls of cellilose and left with 115 1 1/2 in holes and plugs wood and stucco .what is the easiest way to finish .thank you anyone
We have 3 full stories, the 3rd being an unfinished/unisulated attic. House built in 1900, no insulation what-so-ever. We are contemplating doing this job ourselves, I am just thinking it may take too much time (something we dont have a lot of) what with drilling 2 holes per stud cavity per floor. (we would not be doing the attic with blown in since the walls are unfinished up there, we will just use batts.) Now with the mess and other problems mentioned above, I am even more leery. To the pro who says he can complete a job cheaper than a homeowner can buy the materials, that just seems a little unbelievable to me, unless you have a very cheap source of materials, and dont charge much for labor.
We also are planning on doing a complete re-wire for the house since it still has all knob/tube wiring. Thats probably something we should do prior to blowing in insulation right?
A good way to control the dust is to put the strongest fan you can find in a window opening blowing out. it helps to fill in any spaces between the fan and the opening, say, with rags or tape or custom fill these openings with styrofoam insulation from home depot-$6 for a 4’x8′ sheet-first cut the styrofoam to totaly fill the window opening. then cut a hole for the fan to blow through. then open windows on the opposite side of the house. i’ve tried lots of methods of dust control and this works best.
We have a home built in 1930, it has plaster walls, real wood siding on the outside, and I’m sure no insulation in any of the outside walls. I’m toying with the blown in insulation, but after reading all these posts, best of which about the air flow back out, meaning two holes between every wall section, repainting of every wall in every room. I have no idea where to begin. It sounds like a summer job that can’t wait till summer, but it’s the dead of winter in Central PA and the house is burning 600+ a month in heating oil. any suggestions?
We have two rooms that sit above a finished garage. The ceiling in the garage wasn’t insulated. Can anyone recommend a procedure to blow insulation into the ceiling of a finished garage? Thanks much!
I also had a terrible experience blowing in insulation about a year ago. Since then I invented an attic stool to help eliminate the fatique and safety issues while working in the attic. Watch a demo at rafterstoolcompany.com
Hey all – thanks for all the posts. I have been doing a lot of research on this project over the last few months leading up to this weekend when I am hoping to undergo dense packing cellulose into existing plaster walls and in the attic (under floorboards) in the attic of a 1950 home. Greenfiber has been very helpful, and if anyone is thinking of trying this I would suggest calling them and talking with a technician about your specific project. I am not sure how this is going to go this weekend, but I am hoping I’ve done my research enough that I will be prepared. If I have learned one thing with this remodel though, it is to always expect and be prepared for the unexpected!
More specifically, The tech I spoke to told me to drill a 2.5″ hole in each stud bay about 8″-10″ from the BOTTOM plate. (I am sure this depends on the framing of your house though). Feed 1.25″ dia wall tube into the bay to about 8″ from the TOP plate. Begin blowing. Once you think the bay is full, keep blowing. Once the machine begins to slow down and make a high ptch noise, retract the hose about 8″. Rootch it around in the bay to create space for additional cellulose to fill. Continue with this method in 8-10″ increments until you have retracted the hose from the hole. Dense packing sidewalls means you want abt 3.5 pounds per ft3, and shouldnt be able to push your finger into the cellulose once you are done in the bay.
Hope this works for me. If i think of it, i will let you know how it goes. I like the sponge idea – will probably try that – hopefully it will allow enough air to escape from the bay while it is filling.
Anyone have any thoughts on patching the plaster after I’m done? I am thinking possibly styrofoam plugs, and then spackling over??
I have a room above an insulated garage that gets extremely cold and extremely hot. I don’t think the builder insulated the floor between the garage and the room above. The walls are insulated as well as having an insulated garage door.
I am thinking of blowing insulation between the studs to keep the room above climate controlled. What is the best DIY way to do this?
Excellent posts, everyone. You may want to see the video on This Old Hose on this subject. http://www.thisoldhouse.com/toh/video/0,,20047052,00.html
Well, I have an EXTREMELY old house that by all rights should be torn down. I inherited my dad’s hobby farm, and the house dates to the 1850’s. But it was free, and has good land around it to grow on, so I’m going to try and make a go of it. This house needs everything-including insulation because it is so cold the furnace never shuts off. I use kerosene heaters to help out.
My fear is that this house may not even BE insulate-able. The walls appear to be very tight drywall, then the wood frame, and sometime in the 1970s a previous owner used metal siding on it. I’d love to strip it off, but I’m afraid that the wood underneath is in bad shape. The rooms have odd doorways and old windows, the kind that pre-date even the sashcord-and-weight kind.
ARE there houses that just can’t be insulated using blown-in? I think insulating it is the first big project to tackle-among about 100 others..
Thank you for any help..Carson
How do you blow exterior walls that have insulation in them. House is 40 yrs old.
Proper chimney and plumbing bypasses as well as a proper airtight insulated hatchs and proper daming around chimneys and othe heat emitting appliances are vital. All these things cause the price to increase. the main thing is us as insulating pros are going to use alot more insulation and be certain of not missing any hidden areas like dormers or just a hidden cubby in your attic. I guess you could do a attic somewhat cost effectivley on your own but dont even think about doing walls with a rental machine. You should be getting 3lbs per cubic foot of wall space. In a 2×4 wall thats one lb per sq foot. so one bage should do 25 ft2 thats it. Not a whole wall or half the house with one bag. No good.
It must be more work to drill holes into plaster and lathe walls.
How do you do this with out making a bigger mess?
Plaster walls will dull the hell out of anything and then if the cutter on the lath, it can make the wall crack and flake more.
Any sound techniques for making holes in plaster and lathe walls?
thanks for the tips, plan on doing this as soon as weather breaks. Now we know what to look for when we get started!
Have plaster walls and want to blow in insulation. On other sites it is said that without a vapor barrier in the future there will be problems with dampness, termites, etc. What are the facts? Thanks, Larry
Hi Everybody. There are some very good comments here but I see no mention about vapor barriers. I’m thinking about blown cellulose in the ceiling of a Cabin that has 4×8 sheets of manufactured fiber board for the ceiling. The area above it is too small to get in there to put plastic down. What to do?
Hi. This if for Doug E. You can buy a hole saw with diamond dust coated teeth to drill thru plaster. You’re correct, a regular hole saw gets dull very quickly. Be sure to wear safety glasses. It’s noisy, messy and potentially dangerous from the plaster bits flying about.
I am looking to insulate my basement walls. The studs attached to the wall are 1 x 2. will an isulation hose fit into this area, or will I need to ripout the drywall.
My house was built in 1915…it has NO insulation in the walls. I have aluminum siding on the outside so I think it will be easier to blow in from the inside. Several concerns. First…I have plaster walls…how will drilling so many holes into the plaster affect the integrity of the wall? Is there any way to determine if there are fire breaks in the stud bays before I start blowing into the wall?
Is there a contractor that provides this service in California in th LA area?
Where did you rent this in Denver? Pls tell. I just rented the one from lowes and was a total disaster
Having done this for work for years I would like to suggest a few hints. First it is now recommended (required in most programs) to do what they call a dense pack in your walls. This is done by drilling a hole (I use a 2 9/16 bit) and a tube to fit in with room to spare (outside diameter of 1 1/2 ” ) and push the tube first down the wall, and then up the wall and slowly pulling the tube back out as it fills to capacity. This prevents it from settling down thus leaving voids later. The sponge works great to seal around the hole while blowing. BE SURE to check the integrity of ALL wall areas (under cabinets-behind tubs -around plumbing penertrations) as IT WILL MAKE A MESS if there is any holes, make sure your sheetrock is atleast 3/8th thick or they will buckle and blow out if your using the proper pressure. Spackle the holes ( I fill the holes with expanding foam and trim off excess the next day before spackling) and paint, then just sit back and enjoy the new found comfort of your older home.
We love to hear from you, dear readers.