

We didn’t make any progress last night – too tired, too bored with drywall – but I thought I’d post some photos of last weekend’s wallapalooza.
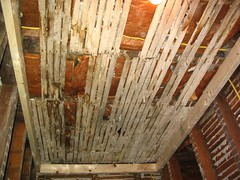
That is the ceiling “before” – you can see the insulation peeking through, and the rough shape of the lathe. This is why we decided to frame up a new ceiling beneath it.
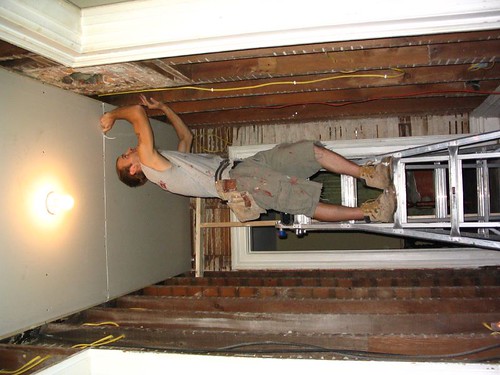
Here, you can see the ceiling has been installed. You can see what’s left of an old brick chimney to the right of his arm. You can also see our deadman (for supporting the ceiling boards while we screw them in) in the back, by the doorway. Teague is notching out the edges of the boards to create a nicer seam for smushing sheetrock into. This is a little trick he just taught me, and it’s genius! You can get a closer look here.
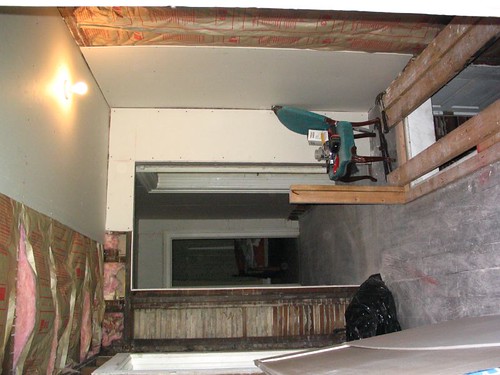
This is where we’re at now. The back part of the hallway is finished. You can see our “scaffolding” over the stairwell, consisting of 3 long boards nailed to the floor and a few props underneath them keeping them steady.
Here’s what this carefully crafted system looked like in action:
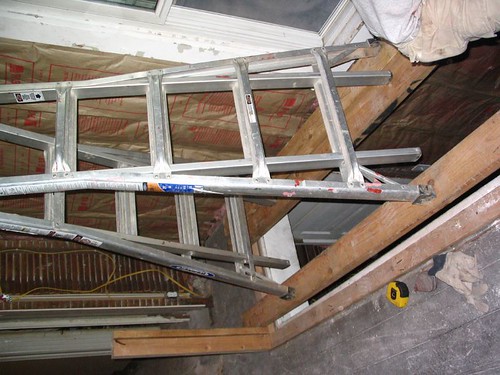
At one point, both of us were on this ladder with a wobbling piece of sheetrock balancing precariously on the top of our heads. I do not recommend this particular route and must add “DO NOT TRY THIS AT HOME”. It was neither safe, nor fun, but it got the job done and we’re alive to tell the tale.
We’re going on day 3 of using our stairwell with the boards still in place, and the dust you see there? It remains, still, this nasty and dirty. There’s nothing like getting out of the shower all nice and clean, only to squidge up your feet the minute you leave the bathroom. Then wriggling between boards and bits of wallboard to make your way downstairs… Oh well. More motivation to finish up soon! As I mentioned before, I refuse to clean the same mess up twenty times.
If you’re planning to install wallboard anytime soon, here are a few helpful links:
Installing Wallboad (diyornot.com)
With drywall, easy does it (Washington Post)
Comments, Thoughts, and Feedback
*shudder* You made me feel all queasy with that scaffolding pic. eeee, I don’t do heights. The hall is looking great, though! :)
Without having you or Kurt next to me, I must ask about the groove cutting for the sheetrock- I’m not “seeing” it- in the pic it looks like Teague is doing it around the nails at the seams? Awesome progress as always!!
Katherine –
What he did was cut a little 45-degree angled groove on either edge of the drywall sheets, right where they butt together. So when we fill it with sheetrock compound, it will have a larger area to spread itself across and won’t sink/bubble as much. At least, that’s what I got out of the lesson!
ohmygod that ladder shot! i also clean after every thing is done but i have issues with stuff ie dirt in the walls. also covering everything with plastic helps control the drywal dust, but that stuff is like powder. we had to wrap our smoke detectors in saran wrap! itll look great tho
We love to hear from you, dear readers.