Just when you think you’re far enough away from home to start acting like a normal person (instead of a home repair addict), something pulls you right back in.
Behold my father-in-law, Don, pointing out an obvious case of the “notch trick“.

Teague noticed it on our way out of a Butterfly Conservatory in Durham, North Carolina. He spent most of our weekend getaway pointing out various construction flaws in porches, benches, walls and ceilings throughout the city. Apparently, 700 miles isn’t far enough to escape the obsession.

There is one major flaw to having the non-construction-oriented member of Fixer-Upper (me) write our blog entries. That problem is, I often have only a faint glimmer of understanding as to what the plans actually are. So when I get around to explaining these complex ideas, I break them down into something so simplistic and random that it scares the hell out of those of you (Derek, Pat, Gary, etc) that know what you’re doing.
Fear not, loyal readers. We have not started the roof yet – first, we have to finish the downstairs hardwoods! But when we do dig into the roof, it will be well-planned and executed. Teague worked for a roofing company and has a great deal of experience, so even his incredibly paranoid and worrisome wife is confident that it will be ok.
Some insight on the roofing project:
When the original roof leaked, someone decided to throw a new roof up over the old one. This roof overlaps the cupola by about 2 feet and wrecks the look of things, so we’re taking that out and starting back down at the original.
Our roof has very, very little slope to it, so we won’t be working with traditional shingles. Instead, we will be replacing the old membrane roof with a new synthetic rubber membrane, which I believe Teague calls “EPDM”. This material has a long lifespan (some brands are waranteed for 20 years) and is low-maintenance. It’s most often used on commercial buildings and low sloping residential buildings.
We did a bit of discovery yesterday and found that the original decking (8″ wide wood boards) is pretty much intact and usable. This is VERY good news, since it means no boom lift or other device is needed to get plywood up there. Hooray for small miracles.
In spots where the decking needs replacing, we will probably be cutting our own dimensional lumber courtesy of the Wagner family lumber mill (my in-laws own many acres of wooded land and harvest their own lumber).
Over the decking, there is currently a layer of metal, and then the rubber membrane. The old rubber and the metal will get pulled off so that we can start things as cleanly as possible.
Just wanted to ease the minds of all you pros out there ;)

In case you’re wondering just how much it’d cost to rent a 40-foot boom lift, we just got some numbers:
First, if you’re in business like Teague, you must have at least a million dollars in coverage. You must also add the company that you rent from to your policy. If you’re a homeowner, I imagine you can buy insurance through the rental company (kinda like Home Depot does for power tools).
After that, it’s about $130 in delivery and pickup charges, and $700/month for the rental.
Teague wanted to rent a boom lift for our upcoming roofing project – we’ll be replacing the main roof after the hardwood floors are finished. We would use the lift to get materials, like giant sheets of plywood, up on our 40′ tall roof. But after crunching numbers, we’re looking into other options. My father in law, Don, suggested making a homemade tripod hoist.

Remember the infamous homemade scaffolding? My guess is, it’ll look something like that, and the neighbors will wonder how we’ve stayed alive this long using such devices. But, as with the scaffolding, it will work great!
Our loyal readers have probably noticed a little change in the sidebar. It’s true – we’ve sold our soul to advertisers.
Actually, we haven’t sold our souls at all, because the two ads we’ve accepted happen to be for companies we have much love for.
Rejuvenation sells period-authentic lighting and hardware that is so beautiful, I squeel like a little girl every time the new catalog arrives. We’ve got two bare-naked electrical boxes in our kitchen ceiling that will remain that way until the day our budget allows for two of these.
And the DIY Network…. I mean, come on!! I would be a DIY addict if our cable company was kind enough to carry the channel. I’ve surfed their site plenty of times for inspiration and ideas, so I am aware of how much I’m missing… If Time Warner was cooler, we could have caught this show on hardwood floor repair. Don’t think I haven’t written a few polite e-mails to the folks at TW begging them to add this channel….
So, I hope you will allow us this little indulgence as we test the ad waters with some worthy sponsors ;)
After our salvage shop trip on Saturday, we came home and ripped into the floors. Having the energy to start a new project after a long day of driving can only mean one thing – our motivation is back. Let the games begin.
Out went the rotted bits under the radiator, and about 10 cupped and warped boards that ran down the middle of the living room and dining room – click here for a photo. Out, also, went every little rusted up nail that was holding them down. We fell into a rhythm. I tackled the demolition work and cleanup, while Teague cut new boards and fit them in.
At first, we had a hard time getting a board to come up without scraping up the one next to it; the solution? Take a circular saw and run it right down the middle, splitting the board in two. Then, each piece comes out easily and doesn’t damage anything around it. To get a nice straight cut on boards we didn’t want to remove completely, we devised a little “pop-up” trick – if you shove a crowbar under the board, it makes a nice cutting ledge ;)

When piecing the “new” boards in, we made sure to cut the boards at different lenths, so that the new and old will blend together seamlessly once they’re sanded and stained. Around the radiator, we also had to replace the underlying boards since you could see through them right into the basement. Not so sturdy, you know? We used pieces of tongue and groove left over from the rotted porch we had to take down last spring. You can see them here:

And here’s the final result of the patching:

I know it doesn’t *look* like a match right now, but once everything is sanded and stained we think it will blend right in.
Once again, the entire downstairs is covered in dust. This time, it’s from the nastiness hiding under all those floor boards. A cough-inducing mix of dirt, dried cat pee, and rotted wood fibers. Mmmmmmm…
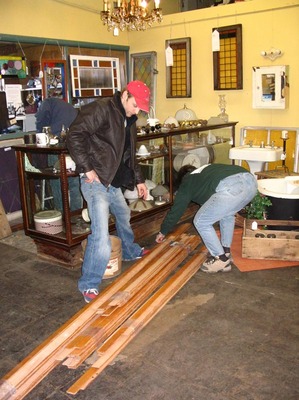
Every few months, we pack up the dogs and head out on a roadtrip to Rochester, NY. It’s not a bad drive – about 2 hours – and it’s home to one of our favorite salvage shops, Historic Houseparts.
This past weekend, in our search for old oak flooring, we inevitably decided to check what Historic Houseparts had in stock (and wander through 14,000 sq. ft. full of goodies) – so we headed west. Unfortunately, they didn’t have the wood we needed. But all was not lost. The guy helping us dig through trim and molding was kind enough to let us know that they had new competition not too far away – ReHouse.

We were thrilled to hear about a new salvage source, and the excitement did not end there. When we got to ReHouse, we found the flooring we so desperately needed at a very good price. Miracle of miracles – for once, the materials cost LESS than we were planning to spend!
ReHouse had an interesting inventory of salvage supplies – some old, some newer, all priced well and easy to sort through. They also had antiques and vintage items sprinkled throughout the store, which made it fun to explore. Their website mentions auction opportunities, where you can bid on items within a (soon to be bulldozed) house and then take them out yourself. This excites me most of all – I imagine we’d meet some interesting people at an auction like that.
We also found some trim that matched perfectly with what frames our doors and windows, so we’ll finally be able to finish off the kitchen. The staff was friendly and patient as they sat measuring each piece of wood in our pile…
We were so happy with our finds, we actually high-fived each other on the way out of Rochester.
Related links:
Rehouse
Historic Houseparts
I love a good list, especially when we’re on it! Top Ten Sources has included us in their top-ten for Houseblogs. And we’re flattered to be in such good company!
Top Ten Sources: Houseblogs
Wondering how much that drippy Victorian you drool over will sell for, or how much your neighbors’ house is assessed at? A house’s worth can be calculated many ways, and often times money has nothing to do with it. But still….. it’s nice to know about the money part.

Zillow (
www.zillow.com), an online real estate service, maps it out for you, using some very powerful little formulas and mapping. You can compare home values (good for buyers), estimate your home’s value (good for sellers) and track your home’s value over time (just plain good). It also allows you to adjust your home’s “Zestimate” (estimated market value) if you’ve been doing repairs and renovations that would raise it’s value. Might be worth a test drive to see how much your sweat equity is paying off!
My favorite use, thus far, is looking at particular streets (like my own) to see what the value range is. If you’re on the low end (we are) you can rest assured that your Home Depot spending is a pretty safe investment. If your house is already at the high end for your neighborhood, you might want to think twice before splurging on ultra-expensive updates.
The basement jacking, quite possibly the most tedious and trying project to date, is D-O-N-E.
I flew in from Florida late last night (greeted by snowflakes; how quaint) to find that Teague had worked his butt off all week to get the basement finished in time for my birthday. Not only that, but the house had been scoured. Hooray! He also got my gifts of a more tangible nature, so I feel like a very lucky 27 year-old.
Visiting my parents and grandparents was incredibly fun and relaxing, and I soaked up the sunshine. But it’s nice to come home and settle back in to familiar routines. Like discussing our next big house project (repairing and refinishing the downstairs hardwoods) over double-chocolate fudge birthday cake ;)
I’ve been vacationing in Venice, Florida for a week now – I left Teague behind to toil in the basement while I bummed around an RV park with my parents and grandparents. As you may recall, my parents are full-time RV’ers and their “home” is a Mandalay coach parked about 15 minutes from Casey Keys. It’s been real rough – long days at the beach with sunny 70’s weather every single day. I haven’t been outside for more than a few minutes since last spring, so the sun and fresh air is exhausting!

Today, we toured a mansion that would make any house voyeur smile. It was Cà d’Zan (“House of John”) – the Ringling Estate, built by John and Mabel Ringling of the famed Ringling Brothers Circus. The house is gorgeous, as are the grounds and their large art collection (mostly Renaissance) which is housed in a museum there.
The mansion is a 22,000 sq. foot “winter retreat” – Venetian Gothic, with a Turkish flair. It sits on the Sarasota Bay, with a large marble “loggia” (I’d call it a patio) for dancing and entertaining. Every window in the place, including those in servants quarters, is made up of colored glass in 4 different jewel-toned colors. The ceilings are impressive, with different painted finishes in each. My favorite was the ballroom ceiling, where each panel featured a different painting of dancers in native costumes. The Ringling’s style was eclectic, to say the least – very colorful and somewhat over the top. There are over 30 types of marble found within the house; there’s a green chandelier in the breakfast room; John bought the interior of his favorite bar and had it repurposed as his cocktail room. It’s decor is meant to surprise and impress, and does it’s job well. But how could you expect any different from circus folks?
My grandmother remembers visiting the estate many years ago, when the Ringling circus was still in full swing. It was winter, the off-season, and the entire circus troupe was wintering nearby – zoo animals, freaks, geeks, and all! It must have been quite the scene.
If you’re ever near Sarasota, I highly recommend a visit – for $15, you gain entrance to the house tour, the art museum, Mabel’s rose garden, and two museums dedicated to circus memorabilia. All fascinating in their own right.
You can also tour Cà d’Zan online: http://www.ringling.org/ca_mansion.asp
When I get home, I’ll post some photos of the exterior and the grounds – including some very large banyan trees gifted to them by none other than Thomas Edison. It’s a place that really makes you want to zip back to the Roaring Twenties!
|

