When I hopped out of bed this morning and my feet landed on smooth, beautiful hardwood floors, I felt like I was at someone else’s house. Having just returned from a week in Bar Harbor, the floors are still very new and exciting to us.
The endless hours of work have already been forgotten, and we’ve taken to gazing lovingly at the wood like proud parents. The refinishing? Without a doubt worth every minute, every dime, and the long 1.5 years we had to wait to tackle it. Even if it meant a summer of cat-pee seepage.
The pine beadboard in the dining room didn’t come out exactly as planned; it took the stain in a patchy fashion, and sucked up every drop. In hindsight, we should have seen this coming – pine just doesn’t stain as nicely as oak, especially 100-year-old pine that’s been painted 5 times, stripped, and then sanded. But the dark color is growing on us and it does look better than the paintjob it had previously. The patchiness doesn’t show up too badly, and where it’s noticeable it almost looks like a faux-patina finish. People pay money for that look, so we’ll deal.
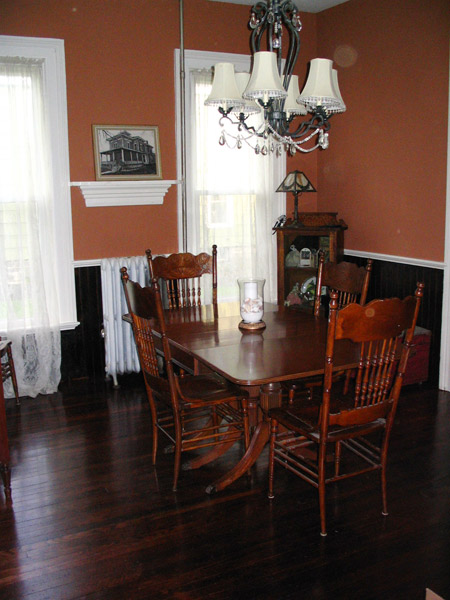
The downstairs (and especially the dining room) has REALLY cleaned up now that it has refinished floors. It doesn’t even feel like the same place. Here’s a few glamour shots for ‘ya:
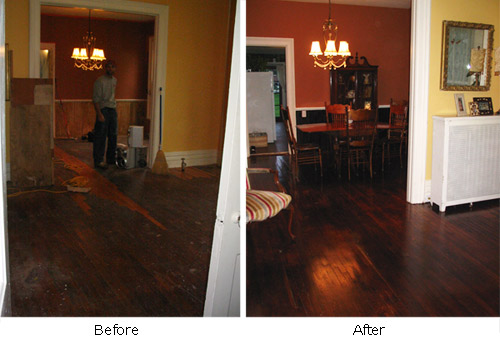
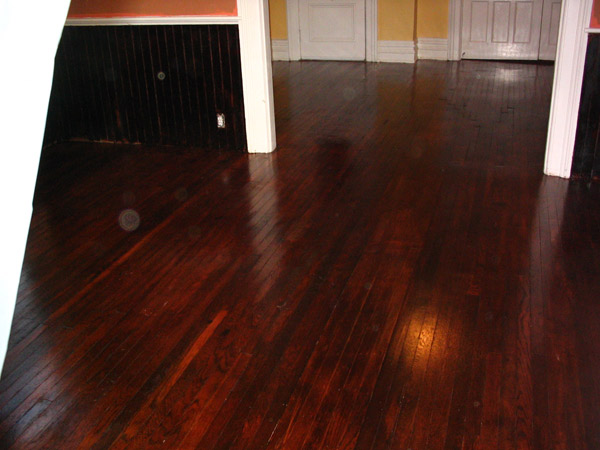
(Ignore the ugly radiator – it has a cover that hasn’t been moved back in yet)
As you can see, our patches blend in pretty nicely. It took some serious grinding of edges with the orbital sander, and some stain-mixing to get the colors right – the newer stuff needed some dark walnut layered into the red mahogany to give it the same tone. We can see where our patches are, but a casual visitor won’t notice them at all.
We need to add basemolding to the dining room, which will hopefully make the beadboard/floor transition a little less funky…. we plan to do it in white to match the rest of the house.
For comparison, here’s some pics of our dining room last Febuary. I’m definitely digging the terra cotta over the mauves…. interestingly, I had bookmarked a similar color scheme WAY back in October of ’04, before we ever moved in!
If you’re a DIY’er considering refinishing your own floors, I say go for it. It was a physically tiring process, but not overly complex or technical – especially if you don’t have to patch in repairs. We saved alot of money and got good results despite having seriously demolished floors!

I won’t be posting much this week – I’m too busy hiking, window shopping, and sleeping in. We’re up in Bar Harbor – Teague is here to put a screen room on his parent’s cottage, and I tagged along for the views.
Right now, I’m listening to drilling behind me – so even though I’m technically on vacation, it feels very much like home!
In true Wagner spirit, the cottage was bought from an old Mainard who drank too much and apparently did not own a level. There’s not a right angle in the place, and much of it appears to be cobbled together from scrap lumber. The neighbors thought for sure that Don and Geri would bulldoze it and start over. And that’s what anyone else in the world would have done – except Don and Geri.
They’ve saved this quaint little piece of history, and each year when we visit it becomes more apparent just how much charm it has. Much like our own house, sweat equity, love, and a few bottle jacks have made a big difference. Bar Harbor could use more fixer-uppers – they have seen many beautiful historic homes bulldozed for the land, on which developers erect McMansions and condos. This isn’t likely to stop soon – prices are so outrageous that only developers can afford to buy them.
I will post photos when we roll back into town and I get my bearings!
Gary’s latest post over at This Old Crack House reminded me that Antique Show season is upon us. I have always loved garage sales, thrift stores, and flea markets, so antique shows leave me squealing with glee and wishing I had won the lottery or been born a Hilton. Ok, maybe not a Hilton – I don’t like antiques that much.
I’ve read great things about the Brimfield Antique Show, held in Brimfield Massachusetts. It’s on my list of “must-sees”, and would make a good weekend getaway for us. The summer show (July 11-16) apparently has the best bargains because of lower turnout (everyone is vacationing or too hot to sort through fields of antiques). Here’s a short description from their website:
Brimfield is considered the largest outdoor antique show in the country. There are approximately 5000 dealers in 21 different show venues (often referred to as fields). The show geographically covers one mile on each side of Route 20. The show runs Tuesday through Sunday 3 times a year in May, July, and September.
Any house bloggers thinking of going to this one?
One I know we’ll be at for sure this year is the Madison-Bouckville Antiques Show, which is being held on August 18th and 19th this year and is the largest show in our area. It boasts over 1,000 dealers and sprawls across 90 acres of farmland. Vendors also line the street, and you can spend all day wandering through their booths without ever getting inside the main gates. It’s large, and full of fun finds, and I can’t wait. We have a big ‘ole truck now…. I guess I should start saving so I can fill it up, eh?
East Coasters – have any of you been to Brimfield? Is it worth a trip? Anyone planning to be there in July, or at the Bouckville show? We could have a meet-up!
Back in January, we got all exicted about a fancy Pegasus kitchen faucet we bought at Home Depot – only to find that the spayer handle leaked, persistantly, even with replacement parts. You can read about the debacle here.
With budget problems mounting, we decided to leave well enough alone for a while and put the old faucet back in it’s spot. It looked none-too-impressive with our nice new sink and countertop, but worked just fine.
So since January, it’s looked like this:
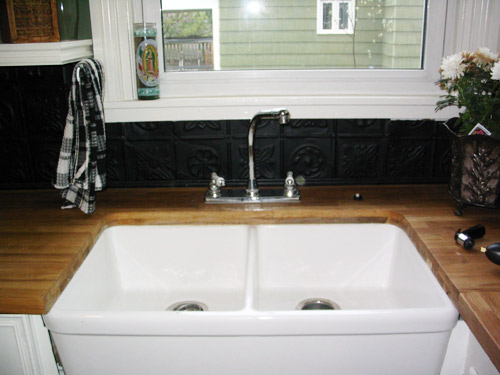
But a few days ago, we got our brand new Belle Foret faucet from Buykitchensinks.com (faucet found here). The difference between this set and the Pegasus one is HUGE. It’s nice and heavy, very well crafted, and best of all NO LEAKS! We got it in oil-rubbed bronze to match the tin backsplash (salvaged from the old kitchen ceiling). We were psyched to finally make the upgrade.
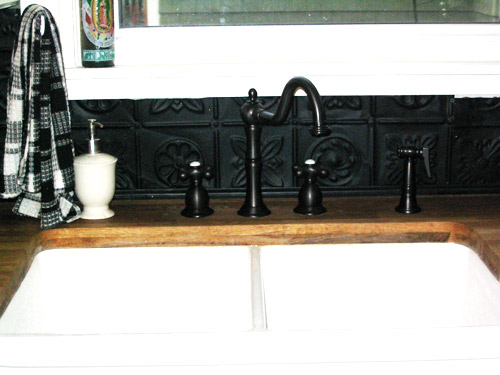
And actually, the Belle Foret faucet was almost exactly the same price as the Pegasus one. Lesson learned? It pays to break out of the big-box stores every once in a while.
We are officially DONE sanding floors downstairs. It was the longest weekend in recent memory – the only other time I remember working this hard was when we were laying tile floor in preparation for our open house. We worked straight through the weekend, except for a quick run to the local townie bar to sip beverages with our good friends Katherine and Kurt. (A much needed break, might I add.)
The results? Our dining room and foyer floors were sanded, the dining room beadboard was stripped and sanded, and everything got a new coat of Mahogany stain. Today, Teague laid down the first coat of varnish and though I have not seen them shining yet, I know they must look beautiful. I can’t wait to get home to them! It still amazes me that our floors could come back from the grave like that – before we started, I honestly wasn’t sure it would work.
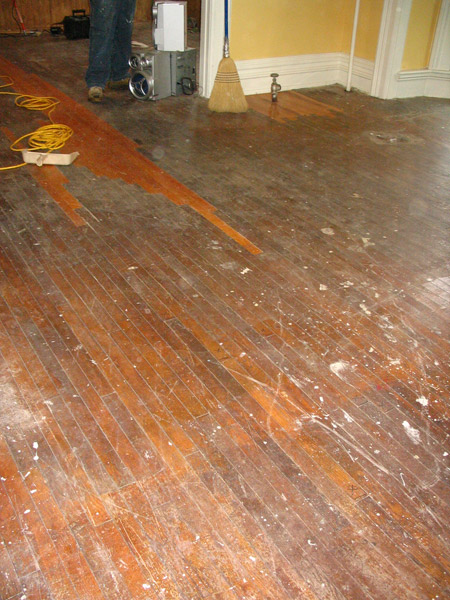
Here’s what we started with – the orange-ish sections are the patches that we made a few weeks ago, using salvaged lumber from ReHouse.
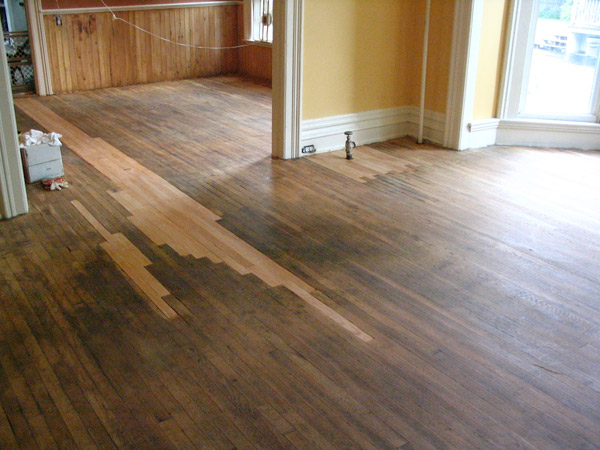
Here’s what everything looked like after sanding and before staining – you can see some darker areas where cat pee caused major problems – hence our going with a darker stain. The salvaged lumber was in much better shape then ours, so we had to do some creative aging and staining to get it to match. You’ll see in pics tomorrow that we came pretty close.
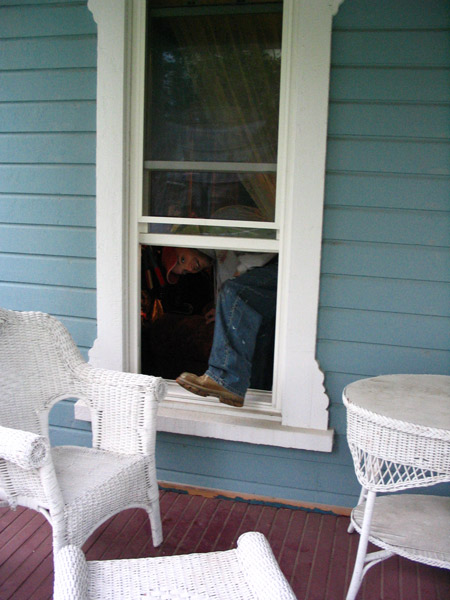
It was not an easy weekend…. the next time we decide to sand floors, I’m taking a week off and doing it at a leisurely pace. It’s very physical work, and my muscles were protesting this morning when I hoisted myself out of bed, crawled out the window, and meandered to the back of the house in the lovely 40-degree weather we’re having.
Oh yes – you read that right. We are now using our windows as entrance points. That would be because roughly 1/2 the downstairs is a no-walk zone for the next week or two.
Here’s Teague, all bright-eyed and bushy-tailed, leaving for work this morning:
Yeah, so you know that easy “repaint the dining room” project I mentioned a few days ago? Well, like any fixer-upper undertaking it tripled in size, turning into “repaint the dining room, twice, strip and sand all of the beadboard, and stain it to match the floor”.
It added about 3.5 million hours to our timeline, but I’m pretty sure the results will be worth it.
We repainted because after bragging about my love for Emberglow, we decided it was too light against the white trim. The apartment we used it in had nice dark woodwork, and that made the orange not so orangish. Against the white, it wasn’t the same. Can you tell we’re SUPER anal about color??
Our second choice was a terra-cotta color called “Decorus Amber” from Sherwin William’s Victorian Palette. It is more subdued, and goes very well with the kitchen’s green tone. We’re both really happy with it – a glorified is a miracle.
We decided to strip the beadboard after priming – which means we actually ADDED a layer of paint before taking it all off. Yes, this is dumb. We thought we were going to paint it bone china to match our trim, but didn’t like the look of the vast non-colorness. It really takes focus away from the beauty of the beadboard. So here it is, after priming and before stripping:
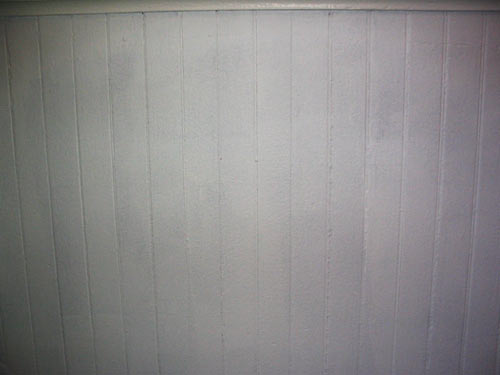
Stripping the beadboard (which runs about 1/2 way up the wall) is intense. It’s taking a long time, creating a huge mess, and making my arms feel like jello. I did feel better about the whole thing when we found that the original finish was a nice mahogany shellac – very close to what we’re planning for it. That’s a sign, right?!
We’ve used virtually every stripping technique we know of to get it all clean and ready to go before tomorrow (when we start sanding the floors in there). Our process, thus far:
STEP ONE:
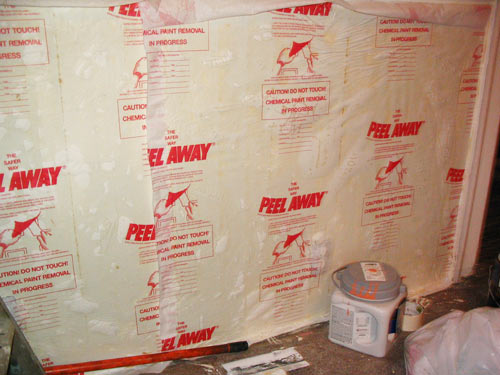
Apply a nice thick coating of a chemical stripper called PeelAway 1. This stuff is great, but we don’t regularly use it because of the cost and mess involved. We’re in a hurry this time, so my favorite stripping tool – the heat gun – is out.
STEP TWO:
Remove all of the PeelAway, using scrapers to get as much paint-sludge off as possible.
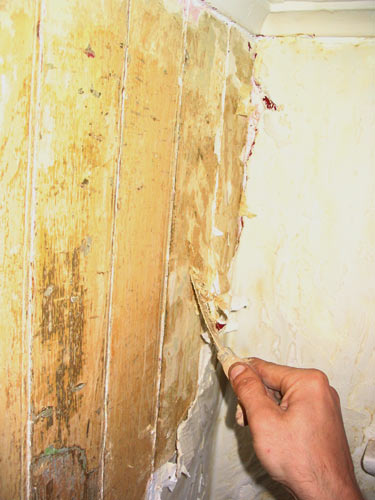
STEP THREE:
Apply a coating of regular chemical stripper (like Strypeeze), let it sit for about 20 minutes, and scrape again. Use a wire brush and scouring pads (specially made for stripping wood) to scrape off little bits. Clean out the the grooves with a screwdriver, being careful not to scratch up the wood. Make a giant mess with all the chemical crap we’re slinging off the walls. Are we having fun yet?
STEP FOUR:
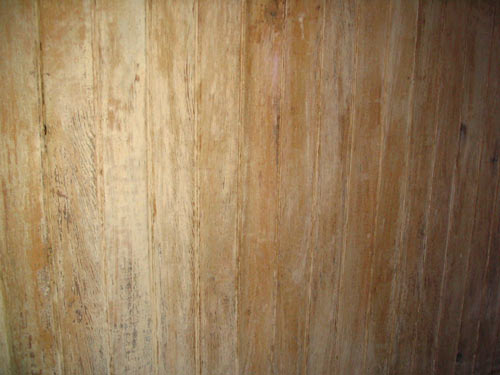
Sand down the surface so it’s nice and smooth ready for stain.r
I’ll be sure to post “after” pictures when we get there. Expect some major updates on Monday, because this weekend we’re refinishing the dining room and living room floors. Yeehaw!
By now you’ve probably noticed our new look. Pretty snazzy, right? I thought it was time to clean up and simplify. What you might not notice is that the software running our blog has changed. After building a few sites in WordPress, I fell in love and decided to wave bye-bye to MT. Non-techies won’t care, but WP is so much smoother on so many levels. If you’re up in the air about which free blog software to use, I’m all about WordPress these days.
Anyway, on to the fun stuff. I’ve added a few features here and there, including better archiving (check out the bottom of the page!), a clearer category breakdown (sidebar on the left), and a soon-to-be-expanded Photo Gallery with Flash slideshows (link in the top menu).
The changeover did not go as smoothly as planned, which is why you might have noticed the site down, missing, or totally broken throughout yesterday and today. It seems to be in order now, though. Let me know if you run into any problems – as with any new site, it’s bound to have some quirks to work out.
Ooh, and if you’re in Internet Explorer 6 or lower, the bottom menu doesn’t look quite right – it’s missing some of the gray background – but since I’m a Firefox girl at heart, I decided I didn’t care enough to fret over it. I tried to fix it, I really did, but it wasn’t meant to be. IE 7 will be out soon, and it looks fine in that ;)
Just a note to let you know the site is in transition – I’m moving it from MovableType to WordPress, so if you see some bugs, missing images, or other sloppiness don’t worry…….. it should be back to normal momentarily!
We don’t have a “garage”, exactly – we have two small tool sheds instead. Teague keeps them pretty neat, but with all the goodies we’ve got in there it’s sometimes hard to find a spot for stuff. What we really need is a 2-car garage and a heated workshop. Until we win the lotto, we’ll have to live with what we’ve got.
In my reading, I came across this article from the “Organizing L.A” blog, with great links to heavy-duty garage organization systems.
I also found their before/after photos (like this garage) incredibly inspiring – when we get the hardwoods done, I’m all about SPRING CLEANING!
Once again, we spent the weekend painting. What can I say – we like color. Alot.
This time, we took the dining room out of the pink and into something a little more natural. After much speculation and a few heated arguments, we decided to paint the top half of the room with Sherwin William’s “Emberglow“, a brownish-orangish-salmonish color that we used in a previous apartment and absolutely loved.

Anything orangey is tough – it changes alot in different lights, and the wrong tone can easily look garish. That’s why I was thrilled to have found Emberglow the first time around – and it didn’t disappoint me this time either.
We’re still debating on what to do with the bottom half of the room, which is covered in the original beadboard. We may just strip it back to the wood and stain it to match the floors. If we don’t do that, it’s going to get a coat of Bone China to match the trim throughout the downstairs. Anyone care to weigh in?
Since Teague and I have both painted interiors about three zillion times, we’ve got the process down to a science. Here are some tips for painting newbies:
1. Use primer. It may seem like an extra step, but it makes life easier and saves money in the long run (you’ll need less coats of the expensive paint). We swear by Killz – it knocked out 20 years of nicotine stains in 2 coats.
2. If you’re a color lover, don’t cheap out on the paint. WalMart and HD’s paints will never look as good as the good stuff. The colors are always just a wee bit off, and the coverage is terrible. You’ll spend more time painting and you’ll go through more paint. I’m a Sherwin Williams devotee, but I hear DutchBoy is pretty lovely too.
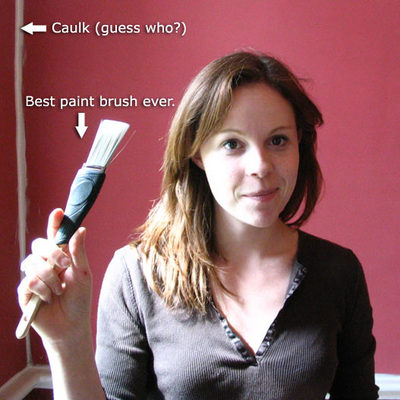
3. GET A GOOD TRIM BRUSH. I can’t stress this enough. I didn’t “see the light” until last winter, when Teague introduced me to the wonder that is Rubbermaid Professional Paintbrushes. Suddenly, I became a master at cutting in trim. I can get cleaner edges with my trim brush than with a roll of painters tape. When you invest in a good brush, take care of it. It’ll serve you well for a long time.
4. Get the right nap on your roller. Don’t get a heavily textured one unless you NEED it (if you’ve got super bumpy walls), because the paint doesn’t go on as smoothly.
5. If you’ve got high ceilings, invest in a long handle for your roller. They’re about $10 and totally worth it – it saves time and cuts your ladder use to a minimum. You could also steal the handle off an old broom for this purpose.
6. Make sure you save some paint for touch-ups, and mark your cans with the name of the room. Otherwise, you’ll spend way too long pulling out cans in the basement searching for the right match.
I am very serious about my love for trim brushes – I just got a new one (at WalMart, for $7.60, if you’re looking for one) and made sure to put my name on it in permanent marker so *someone* doesn’t steal it for his day job.
Looking for your own fixer upper? Consider a for sale by owner home, we have multiple listings of homes for sale, and the leading FSBO in North America. Looking to sell? List your home for sale by owner at Homesbyowner.com.
|

