Want to send your dog into violent fits of rage? For $29.95 you can install a “Pet Peek” in your privacy fence, so he can see every little leaf that blows past HIS property, and bark his head off accordingly.
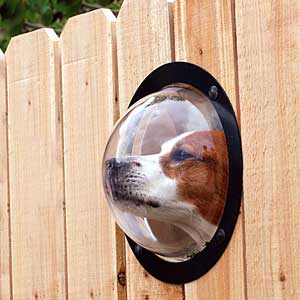
Please tell me I’m not the only one that finds this product shot (complete with uber-serious guard dog) totally hysterical!
We were stupid enough to install picket fence for our two lovelies, so they have no trouble at all finding things to yap at. In fact, if Nero finds something extra exciting he can just shimmy himself through the bars to check it out. But if you’re stuck with a big old privacy fence and don’t really want that much privacy, you can buy your own Pet Peek here. You could find all sorts of ways to freak out the neighbors with this thing.

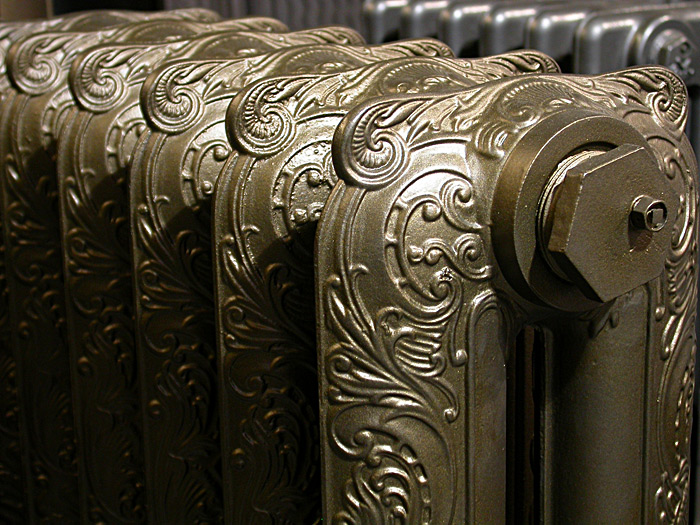
We have a one-pipe steam heating system, which is highly efficient when it’s running properly but requires quite a bit of fidgeting & futzing. We spent many a night falling asleep to the clangs, gurgles and pings of radiators that were not well-adjusted before we figured it out all.
What we’ve learned about steam heat thus far:
- Steam radiators don’t need bleeding. I grew up in a house with hot water radiators. On hot water radiators, turning the bleed valve a few times lets the extra air out – air which is taking up space that water should be in. It stops the hissing and spitting and evens out the heat. So every time our started acting up, my first response was to let some air out. Eventually I realized that trapped air should get forced out the air vent, the small metal tdirectly above the supply valve at the top of your radiator. This vent can get clogged up by hard-water scale deposits, so try poking the hole with a pin or paper clip. Not working? You can also shut the radiator off at the supply valve (base of the radiator), carefully remove the vent, and boil it in white vinegar or soak it in CLR to get rid of all the deposits. Still no luck? Better replace it. (We have replaced 4 of ours so far.)
- Clanging? Banging? Pings? You don’t have to live with them. Our radiators used to make all sorts of noises. Mostly loud banging and knocking. It’s caused by water getting “stuck” in the pipe, sitting their chilling between firing cycles and then being hit with fresh new steam. One fix? A little tilt. The proper pitch for our system is one inch for every 20 feet. We shimmed out 3 of our radiators, tilting them toward the drain pipe by sticking wood shims (or in one case, ceramic tiles) under the back feet. About 1/4″ should do it. This cut down tremendously on the noises. We also found a pipe in the cellar that had wiggled loose from the bracket that held it, leaving it free to jump around however it pleased. When we tied it back where it was supposed to be, this stopped it from hitting other pipes nearby. Fixing the pitch also took care of a radiator that originally only got hot about halfway across.
- Got orange rust in your sight glass? Time to drain it. The “sight glass”, or water level tube, on the front of our boiler, gets pretty nasty looking after a while. When we notice the sludge building up, it’s time to drain it until the water runs clear. This is a very simple one, and having a clean level means you can actually see where the water level is at. It should be right around the middle.
- Burner flame yellow? It should burn much hotter than that; there’s not enough ventilation. Something (possibly your flue) is probably clogged or rusted, or your gas pressure might not be right. It’s not only inefficient, it’s dangerous because it can cause “flameout”. Get a pro over to get your system back on track.
- Insulation counts. If your lines don’t have any insulation on them, they might be cooling too quickly – adding to that pounding problem. We insulated everything we could reach in the basement. Saves on energy costs and sleep deprivation! Want to stop losing heat to the wall behind your radiator? Try a piece of foil-coated rigid insulation behind it. Nobody will notice it, and it’ll help direct heat away from that uninsulated plaster… ;)
- Touch one, you’ll have to touch another. It’s pretty much a guarantee with old heating systems, and old plumbing in general. Move a radiator so you can sand the floor? Hook it back up and somewhere in the system you’ll find a new little leak or get some new banging. Turn off the radiators in unused rooms and the same will happen. Plan on spending some time “tuning” your heating system each fall, tweaking things till it the whole thing works in harmony.
- Make sure they are all attached (an “oops” we’ll be laughing about for decades to come)
Need more tips? HeatingHelp.com is the site I refer to most often – it’s full of useful (and easy to understand) articles, not to mention their “Question wall”.
Curious as to why that steam boiler is so big? Blame it on lazy men and big oil! Our friend Tom pointed us to this article a few years back. It’s a very interesting read.
A friend passed along this “consumer alert” via email… too funny not to share:
Home Depot Alert
A ‘Heads Up’ for those of us men who may be regular Home Depot customers. Over the last month I became a victim of a clever scam
while out shopping. Simply going out to get supplies has turned out to be quite traumatic. Don’t be naive enough to think it couldn’t happen to
you or your friends. Here’s how the scam works.
Two seriously good-looking 20-21 year-old girls come over to your car as you are packing your shopping into the trunk. They
both start wiping your windshield with a rag and Windex, with their breasts almost falling out of their skimpy T-shirts. It is impossible
not to look. When you thank them and offer them a tip, they say ‘No’ and instead ask you for a ride to another Home Depot or Lowes.
You agree and they get in the back seat. On the way, hey start undressing. Then one of them climbs over into the front seat
and starts crawling all over you, while the other one steals your wallet. I had my wallet stolen October 4th, 9th, 10th, 15th, 20th &
24th. Also November 1st, twice on the 2nd, and very likely this coming weekend. Now, that’s hard on a guy my age. So tell your friends to be
careful.
Maybe that explains why our Home Depot bills are so high? ;)
Now that we’re not working 24/7 on our house, the blog is getting a little lackluster…. time to branch out a bit and start moving beyond the “here’s what we did, ain’t it great?!” posts I guess.
So unless you all hate it, I’m going to start a weekly “Worth a Look” post with links to good stuff elsewhere on the web.
This week’s finds:
9 Creative Staircases
You’ve probably seen the “storage staircase”, which hides a drawer beneath each step. But have you seen the staircase slide (a child’s dream come true) or the staircase built inside a giant log?
Sustaining Self-Motivation
Make no mistake – even if you’re passionately in love with your house, it’s hard to keep yourself motivated when the excitement wears off and the work drags on. This article has some good tips for powering through.
Colorcharts.org
An online color database, specializing in the display / search / cross-matching of colors from a variety of products such as paint, stain, and grout. Cool feature? Select a color you like, then hit “Match this color” to see the closest matches from other brands.
Bringing Down the House
Last but not least, Stanley Tools shows how quickly demolition work gets done with the right tools… which is why we have a strict “no demo unless we’re both home” rule. Because when your adrenaline is pumping and a crowbar is in your hands, it’s VERY easy to get carried away…
We’re working hard to earn a black belt in frugal winterizing. Living in Central New York, it’s a necessary skill – unless you’re willing to sell a kidney to keep the pipes from freezing. Everyone has their tactics. There’s the “layer-up” method, whereby you force everyone in the house to wear 3 pairs of long underwear and thick slippers (including visiting guests) so you can keep the thermostat at 55°. There’s the “partition off the east wing” strategy, which requires you to stop using half the space you own so you can turn the heat off in spare (or not so spare) rooms and pretend this means they aren’t sucking the heat up through the walls. And there is the “insulate the bejesus out of every crack, crevice, wall and ceiling” tact, which is by far the most comfortable way to enjoy winter – but also requires the most manual labor.
We take a hybrid approach. A three-pronged attack against the business of big oil. We’ve seen firsthand the ROI of insulation. We keep the thermostat uncomfortably low. And like everyone else in the neighborhood, from December until April we will hibernate on the couch in our sweats with small dogs for lap heaters, emerging from our blanket cocoon only for cups of hot tea and the occasional snack.
One problem you always have in a two-story house is the “heat rises” phenomenon. In our house there is a noticeable temperature change between the first and second floor. With the stairwell wider than it used to be, it has become harder to keep our heat where we want it. Last year I tacked a ratty old comforter up – embarrassing, but functional. This year I decided to get fancy with our “heat block blanket”.
In the spirit of frugality, I repurposed some old curtains and 2 cafe rods we already had to make this lovely beast:
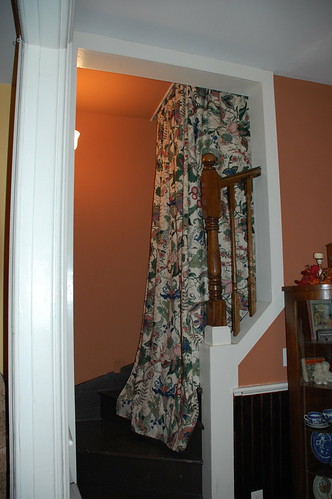
I made it about 1.5 times wider than the opening, and a few inches longer all around so that it would “pool” at the bottom and keep all that marvelous hot air from sneaking through.
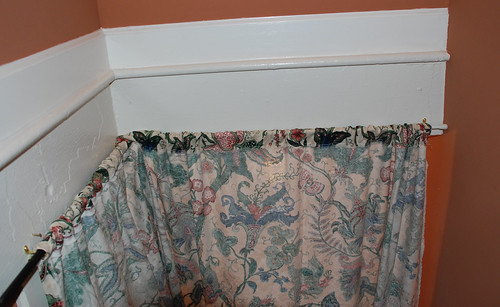
To hold it up, I used 2 cafe curtain rods and 4 shallow brackets screwed to the stairwell trim. Since it’s on curtain rods (instead of nailed or tacked in) it’s easy to take down when guests are expected – because quite honestly, it does look a little weird.
Here’s the backside view:
I spent about an hour making this, which I consider time well spent. Even if it doesn’t save us boatloads of cash, every little bit helps – and doing something about a noticeable problem always makes me feel better.
If I were really fancy, I would have put a backing on it to make this side pretty as well. Maybe next year I’ll add velvet lining and satin tassels :)
Need to do some last-minute insulating at your house? Run down this handy Home Energy checklist from the Energy and Environmental Building Association and check out our step-by-step tutorial on blown-in insulation.
It’s a belt buckle AND a bottle opener. And it’s super cool looking. Put it on your Christmas list ;)

Handyman Belt Buckle from Patina Stores, $28.00
We’ve got a long-standing tradition at the Fixer-Upper house. Every Christmas, we dress the dogs up in stupid costumes and force them to pose for photos. Nero, the min pin, has an effeminate side and absolutely loves showing off his new outfits. He’ll even wink on cue. But Bruiser, the chihuahua mutt, freezes up completely, horrified by the “fat man in a little coat” effect they so often have on him. This year, I decided to humiliate them both a little earlier by getting them Halloween costumes.
I do this not because I’m a person who accessorizes with live animals, but because it’s the best laugh I get all year. And since I cuddle them and walk them and let them lick me incessantly even though it grates on my every last nerve, I feel I’m entitled to a laugh at their expense every now and then.
And why not share the laughter with the entire world? I’m sure Bruiser won’t mind.


The costumes are from Target. The Frankenstein head is hilarious… it looked even funnier on my mother’s dog, Lilly, a pekingese with no sense of humor. Here she is glaring angrily and wishing we’d all die slow and painful deaths, or at least stop laughing long enough to take the hat off her:

Hope everyone has a Happy Halloween!
This year, we bought 4 pumpkins from a campground in Ithaca. They were only $2-$3 each so at that price we couldn’t resist bringing home the biggest, bestest ones they had. But big pumpkins are thick and meaty, making them much harder to carve.
Luckily, we’ve got a lot of carving experience. Back when we had leisure time I used to carve very complex pumpkins. The type you see Martha Stewart bust out in 5 minutes on her tv show but then end up spending 3 hours cursing over at your kitchen table. We have tried every tool in the book, including clay modeling tools, dental picks, and ice cream scoopers. Wanna know the secret to incredibly easy carving?

Ditch that worn-out steak knive, and go get yourself a nice sharp compass saw or jab saw. You’ve probably already got one hanging around your house but if you don’t they’re very affordable – and very handy!

Ten times better than the tiny little saw that comes in all those carving kits they sell in stores, a jab saw cuts through squash like it’s butter and is much easier to maneuver around curves. The one we had on hand was about 9 inches long, but they make daintier ones if you’re hoping to create fancy designer pumpkins. I’d say the jab saw is an adults-only tool, but aren’t almost all pumpkin carving implements?
This year’s jack-o-lantern masterpieces are simpler than in years past, but I think that our trick-or-treaters might appreciate them a little more than the sophisticated (and life-zapping) kind!

Anyone who has visited a tree nursery lately knows how expensive landscaping can be. A nice tree or bush can cost $100 – $200 dollars or more. So we’ve been doing piecemeal landscaping whenever we can. Last year we tried a few trees from a friend’s yard (see this post) but half of them were too young and fragile to survive our abrupt transplant. We also bought quite a few garden plants, one crab tree, and 6 small juniper bushes for one side of the house.
I present to you our newly acquired bushes:
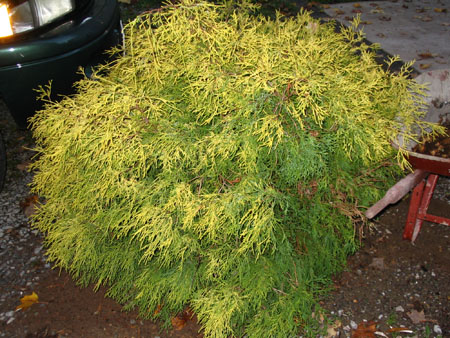


I took these photos with our old camera, which makes for crappy shots – but we’ll get glamorous ones when they get planted. Anyone happen to know what that middle bush is? It flowers, if that helps ;)
If you’re looking to fill your own lawn inexpensively, I have read that fall is the best time to move plants around (say, from your neighbor’s lawn to yours….) They’re getting ready to hibernate for winter and will survive the shock better.

Everyone knows I’m into the pricey paints – but I almost never pay full price for them. $40/gallon? Not a chance. Here’s our secret – we opened a Sherwin Williams customer account a few years ago, which gets us 20% off every day. On top of that, they send plenty of coupons and sale flyers.
I’m sharing the love today – print out this coupon for 30% off paints and stains, 20% off supplies, and 15% off the Duration line.
|

